There are few confections as iconic—or as visually striking—as the classic Big Diner Black and White Cookie. It’s a soft, cake-like top, precisely iced with two contrasting glazes: one half snowy white vanilla, and the other rich, glossy chocolate. When executed correctly, it is a masterpiece of texture and balance. Today, we’re sharing a premium recipe that brings this Michelin-level precision to your home kitchen.
This recipe prioritizes specific ingredients and meticulous technique to achieve that perfect, soft, slightly domed texture. We use cake flour for tender crumb and European butter for richness. The magic, however, is in the two glazes—specifically the deep, Dutch-process chocolate.
The Ingredients for Precision
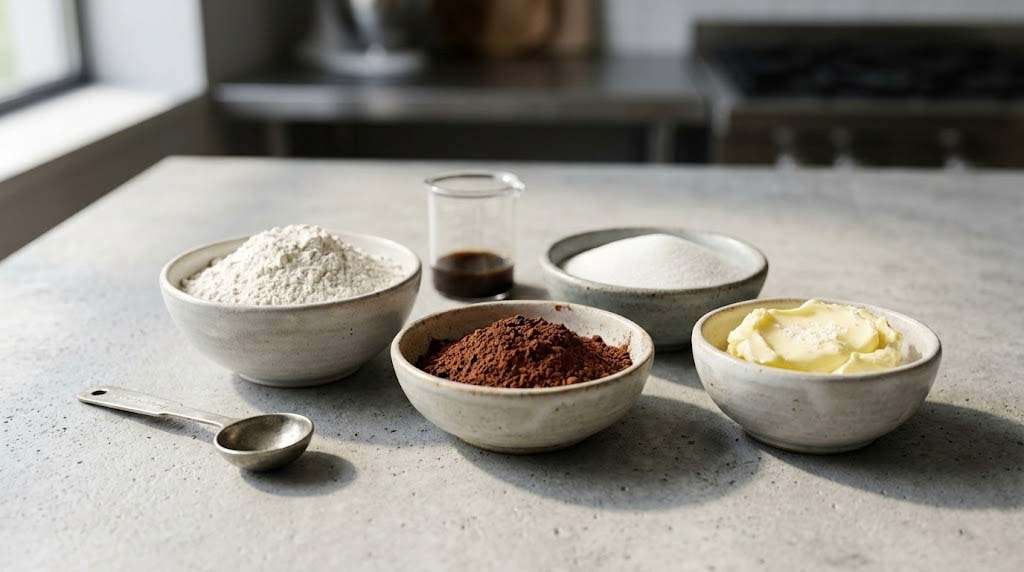
The foundation of any great pastry is the ingredients. For this recipe, we gathered everything onto a clean, cool concrete counter, bathed in the soft, directional light essential for highlighting textures. You will see the quality in every component.
Ingredients:
For the Cookie Base:
- 1 ¾ cups (210g) Cake Flour (The secret to a tender crumb, as seen in the finest bakeries)
- 1 tsp Baking Powder
- ½ tsp Kosher Salt
- ¾ cup (170g) Softened European Butter (High-fat, rich, as seen creamed to perfection)
- ¾ cup (150g) Granulated White Sugar
- 1 Large Egg, plus 1 Large Egg Yolk (For richness and moisture)
- 1 tbsp Vanilla Bean Paste (Look for those dark speckles)
- 1 tbsp Light Corn Syrup (A culinary secret for precise texture and gloss)
- 2 tbsp Whole Milk
For the Glazes:
- 1 ½ cups (180g) Powdered Sugar, sifted
- 1 tbsp Light Corn Syrup
- ½ tsp Vanilla Extract
- 1-2 tbsp Boiling Water (Adjust as needed)
- 3 tbsp Dutch-processed Cocoa Powder (For the richest, dark chocolate half, which must contrast sharply with the white)
Step 1: Mastering the Soft Base
The first step in achieving the classic diner texture is the precise mixing of the base. It’s all about creating aeration and structure. We are going to look for visual cues that indicate the ideal batter consistency.
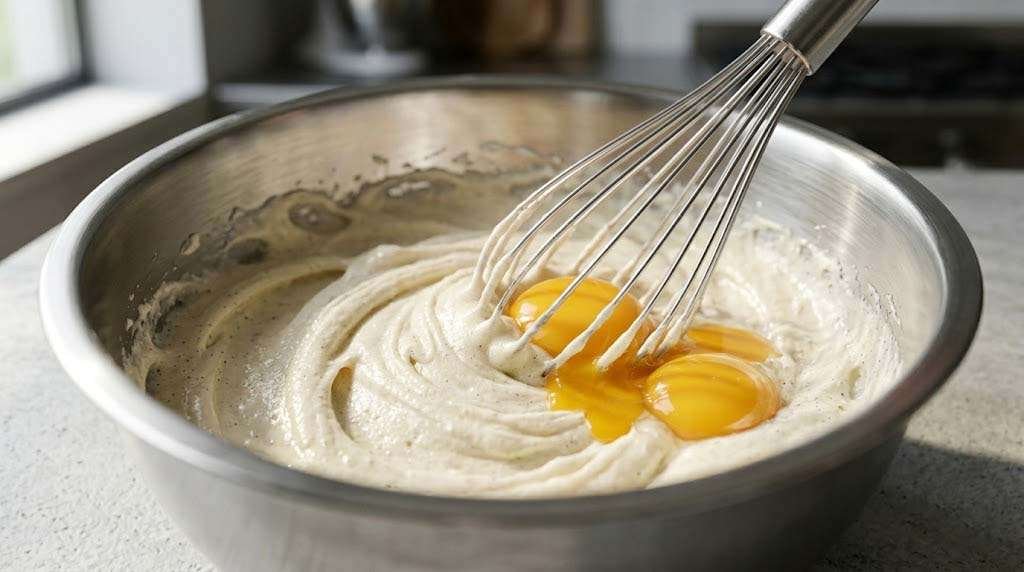
Using that same natural window light, we show the creamy, pale texture of the butter and sugar when properly aerated. When we add the eggs and that fragrant vanilla bean paste, watch closely for the moment it becomes light and ribbon-like. This step, captured with the specific soft, directional lighting, is key to the cookie’s unique bite.
Instructions (Step 1):
- Whisk Dry Ingredients: In a medium bowl, whisk together the cake flour, baking powder, and salt. Set aside.
- Cream Butter and Sugar: In a large, pristine stainless steel mixing bowl (as seen in our step), cream the softened European butter and granulated sugar on high speed. The texture must change: it must go from pale to visually light and aerated. We recommend European butter for that deeper, richer color and moisture seen in image 1.
- Add Egg and Vanilla: Scrape down the bowl. Add the egg and egg yolk, one at a time, followed by the vanilla bean paste and the tbsp of light corn syrup. Continue to beat until the mixture is truly light and ribbon-like—a silky texture, full of specks, as visually defined in our mixing close-up.
Step 2: Baking the Domed bases
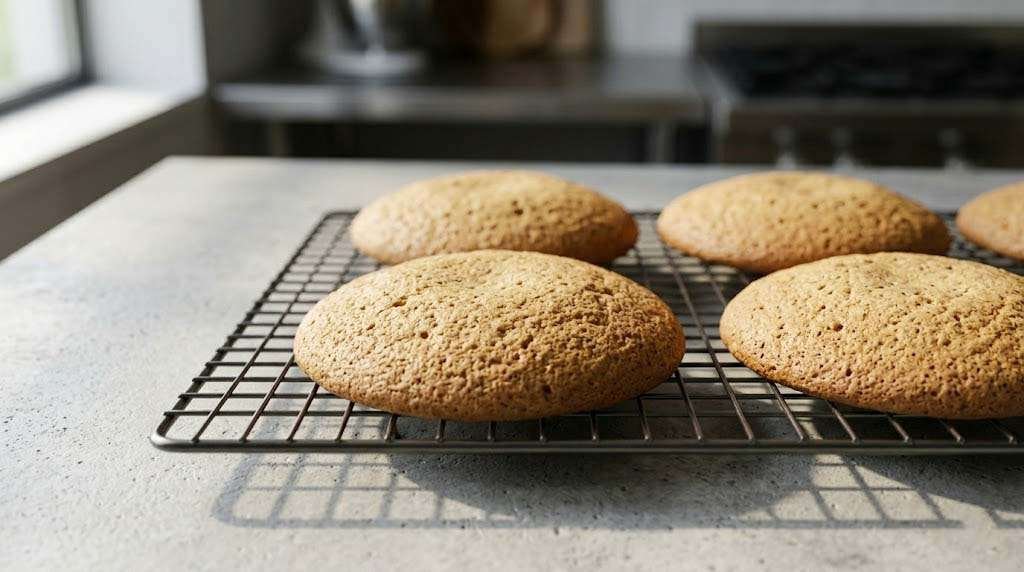
The next phase is baking. Achieving the correct shape and that unique, slightly porous, yet soft, cake-like texture is paramount. The raw batter must be portioned into very large, generous scoops, then baked to perfection.
As the large cookie bases cool, watch how they set—perfectly round, with a gentle, inviting dome. They develop a delicate, golden-brown crust. You can see this specific texture in our image: cooling on a wire rack on the cool concrete counter. Notice how the light from the left emphasizes the soft, porous surface. This is the moment to verify the precise shape before moving to the definitive icing step.
Instructions (Step 2):
- Finish the Batter: On low speed, with your hand mixer, add one-third of the flour mixture, followed by the remaining light corn syrup and milk. Continue with another third of the flour mixture, then the rest. Mix only until the last bit of flour is just incorporated—do not overmix. The batter should look thick, creamy, and visually identical to the batter being whisked in our close-up.
- Scoop and Bake: Using a large scoop, portion the batter into 8 generous cookies, spacing them well apart on a parchment-lined baking sheet. For true big-diner size, we suggest scoops of about ¼ cup. Bake at 350°F (175°C) for 15-18 minutes, or until the edges are very lightly golden and the centers are set.
- Cool: Let the large cookie bases cool on the baking sheet for 5 minutes, then transfer them to the wire rack to cool completely before icing. We recommend using a dark wire rack on that familiar concrete surface, as it enhances the soft texture shown in our baked cookie shot. Wait for the cookies to cool completely before applying any icing.
Step 3: Precise Glazing and Contrasting textures
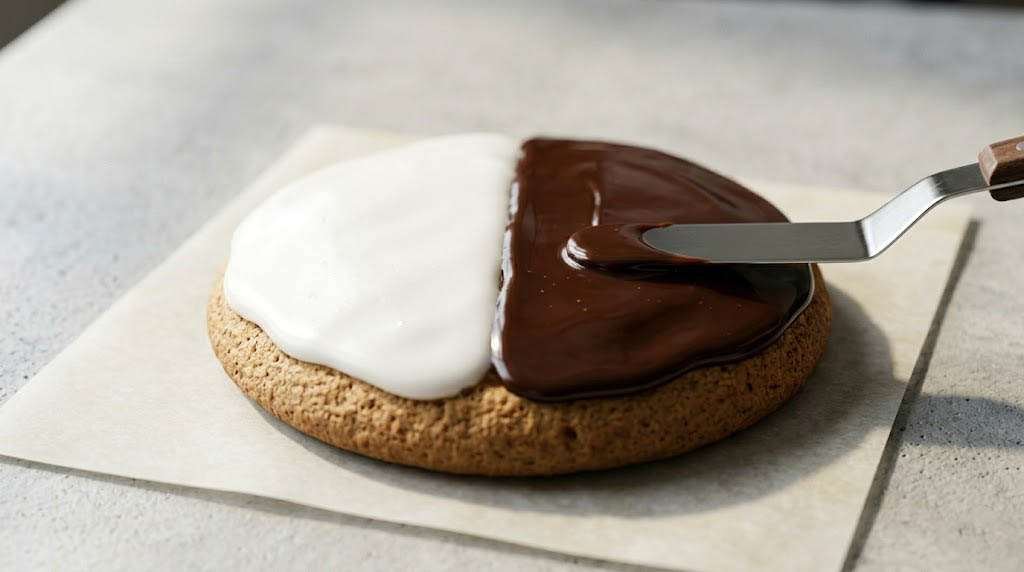
This is the definitive stage: the precise application of the black and white glazes. You must prepare two distinct icings that are thick yet flow smooth, and they must be applied with perfect symmetry and precise technique.
We show the meticulous process of glazing in close-up: an offset spatula spreading rich, dark Dutch-process chocolate glaze (made with cocoa identical to the first ingredient shot) onto one-half of the baked, porous cookie. Next to the sharp central line, we apply the glossy, snowy white vanilla icing. You can see the distinct contrast between the matte cookie, the glossy chocolate, and the smooth vanilla. The soft light from the left emphasizes the textures and the symmetry.
Instructions (Step 3):
- Prepare the Glazes: Make the vanilla glaze first. In a bowl, whisk together the powdered sugar, light corn syrup, vanilla extract, and one tablespoon of boiling water until smooth. Adjust the water, drop by drop, until you have a thick, glossy, yet pourable white icing, identical to the texture and color shown in our glazing photo.
- Prepare the Chocolate Glaze: Place the Dutch-processed cocoa powder and the remaining tablespoon of light corn syrup into a second bowl. Pour in 1-2 tablespoons of boiling water, and whisk until smooth and glossy. For a truly rich, dark contrast, as visualized in our close-up, we insist on Dutch-process cocoa.
- Apply the Icing: For true precision, map the exact halfway line across each cookie with a clean toothpick. With an offset spatula, as shown in our glazing shot, apply the snowy vanilla icing to exactly one-half, spreading it to the center line. Let the white glaze set for 10 minutes. Then, meticulously apply the glossy chocolate glaze to the other half. The key to the clean look is to have the contrasting glazes meet at a precise, razor-sharp line.
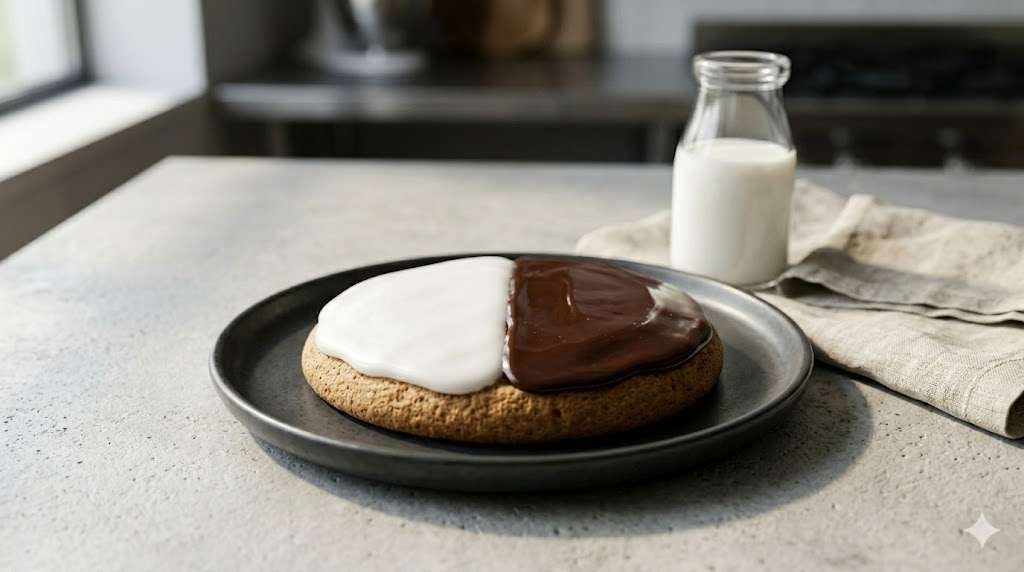
Step 4: Serving the Perfect Diner Classic
With the icing set and the cookies complete, you’ve mastered the art of the Big Diner Black and White. The contrasting textures, the precise center line, and the rich, Dutch-process chocolate all come together for the perfect bite. For the ultimate visual presentation, serve a single, perfectly finished giant cookie on a modern, dark charcoal ceramic plate, on that same textured concrete counter, as shown in our premium final composition. A simple glass of cold milk and a linen napkin provide the perfect context. Enjoy the beautiful symmetry and the authentic, soft, cake-like texture you’ve created.