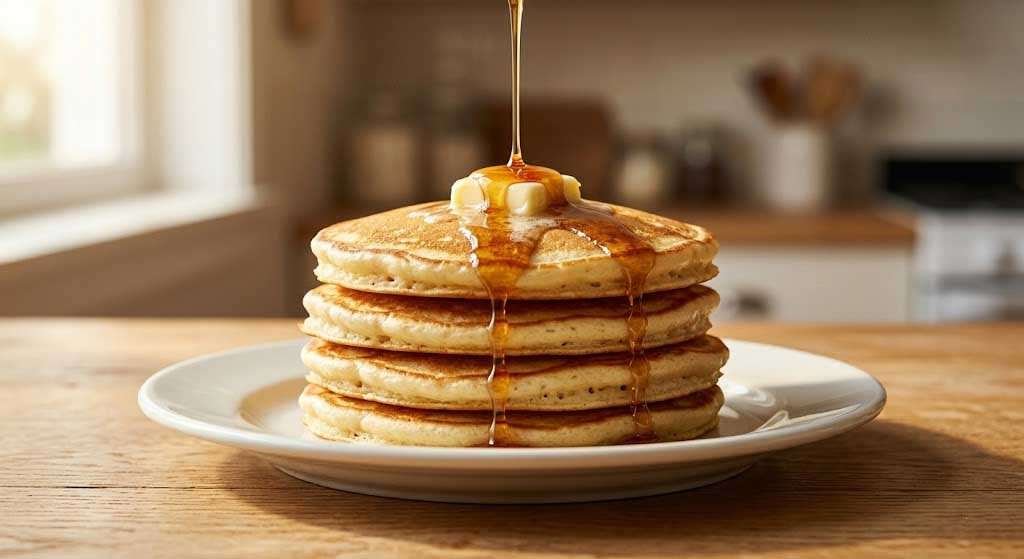
Thick, cloud-soft centers with lacey, butter-crisped edges — these are the pancakes that make people quiet at the table. Real buttermilk gives them a gentle tang and an open, airy crumb that boxed mix will never touch. Ready in 25 minutes, easy enough for any morning.
Prep Time: 10 minutes
Cook Time: 15 minutes
Total Time: 25 minutes
Servings: 4 (makes 10–12 pancakes)
Difficulty: Easy
Key Ingredients
Buttermilk — The non-negotiable. Real, full-fat buttermilk delivers the acid that reacts with baking soda for maximum lift and a subtle, complex flavor. If you’re in a pinch, add 1 tablespoon of white vinegar or lemon juice to 1 cup of whole milk, stir, and let it sit 5 minutes — a reasonable substitute, though genuine buttermilk is worth seeking out.
Baking Powder + Baking Soda — This combination is what gives classic diner pancakes their signature height. Baking powder provides sustained lift; baking soda reacts with the buttermilk’s acidity for an immediate burst of bubbles in the batter.
Unsalted Butter — Both in the batter and on the griddle. Butter in the pan creates those thin, golden-lacy edges that define a proper diner pancake. Don’t substitute with cooking spray if you want that result.
Eggs — One whole egg plus one extra yolk adds richness without making the pancake dense. The yolk is where the flavor lives.
All-Purpose Flour — Standard AP flour works perfectly here. Bread flour is too high in gluten and will tighten the crumb; cake flour goes too far the other direction and loses structure. At The Heritage Diner, we pair our pancakes with our slow-fermented sourdough bread program — if you want to explore adding a small percentage of sourdough discard to this batter for a deeper flavor, read more about Heritage Sourdough.
How to Make Heritage Buttermilk Pancakes
Start by whisking together the dry ingredients — flour, sugar, baking powder, baking soda, and salt — in a large bowl. Make a well in the center and set aside.
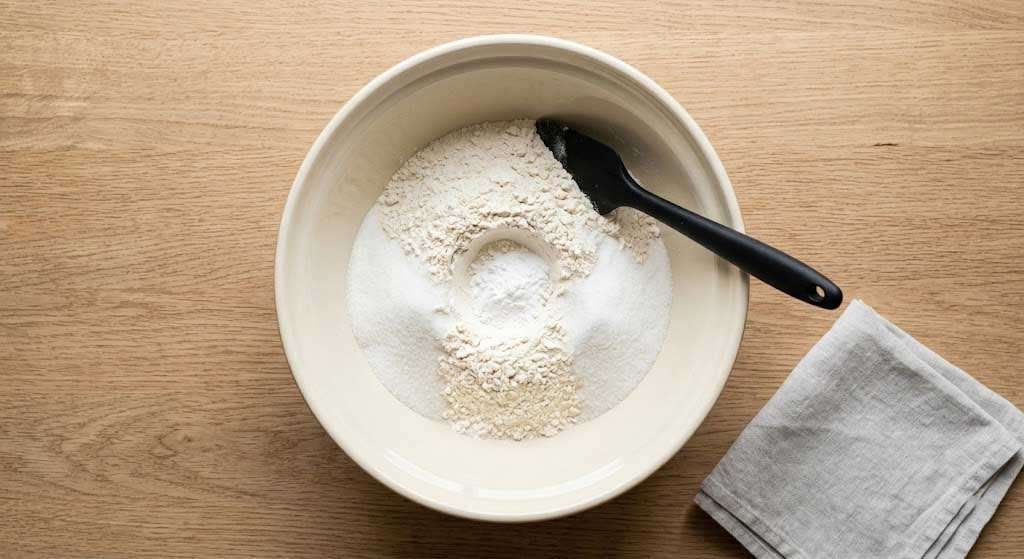
In a separate bowl, whisk the buttermilk, whole egg, egg yolk, melted butter, and vanilla until fully combined. Pour the wet mixture into the dry well and fold together with a rubber spatula using as few strokes as possible. Stop when the batter just comes together — lumps are not only acceptable, they’re correct. Overmixing develops gluten and produces flat, tough pancakes. Let the batter rest for 5 minutes while your griddle heats up.
Heat a cast-iron griddle or heavy nonstick pan over medium heat. Add a small pat of butter and let it foam and subside. Using a ¼-cup measure, pour batter onto the surface, spacing each pancake about 2 inches apart. Cook until bubbles form across the surface and the edges appear set and dry — approximately 2 to 3 minutes. Flip once, cook another 1 to 2 minutes until the underside is deep golden brown.
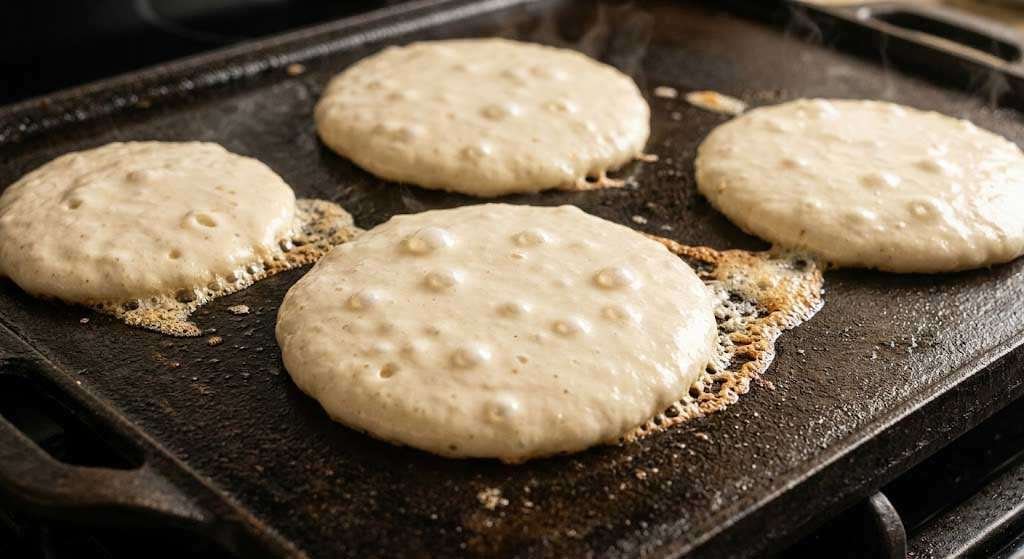
The key visual cue for flipping: wait for bubbles to break the surface and not refill. If batter is still rushing to fill the bubble holes, the pancake isn’t ready. Patience at this stage is the difference between a pale, doughy center and a pancake cooked through.
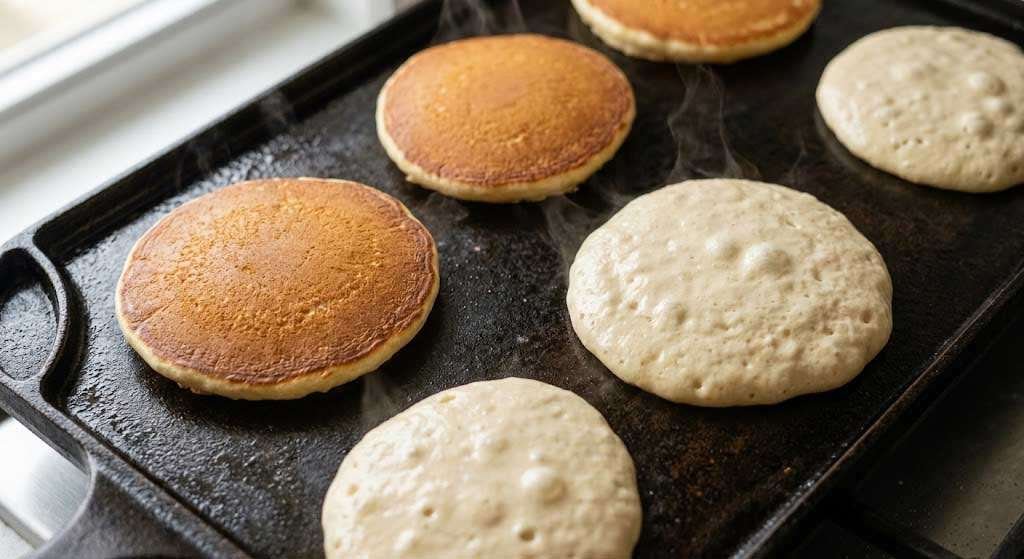
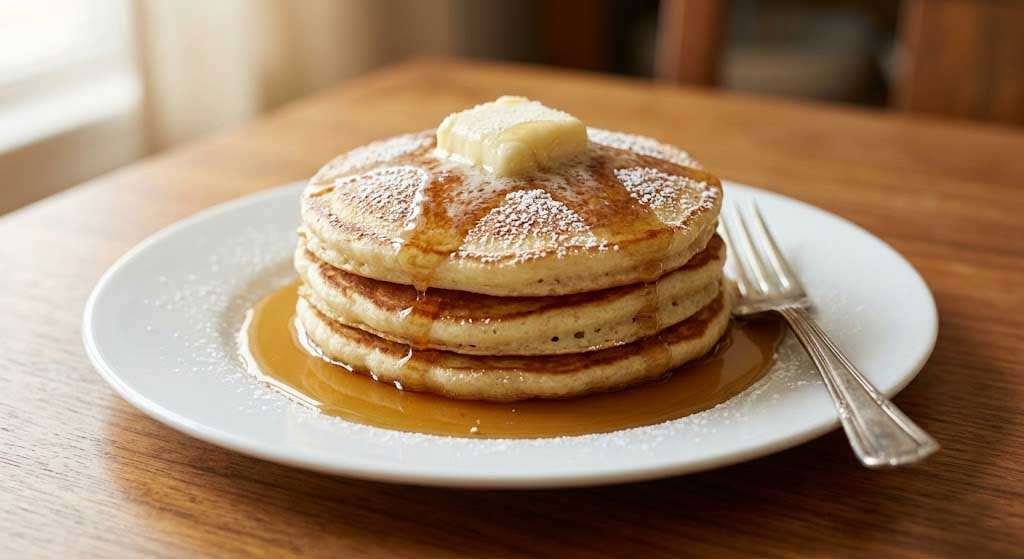
Transfer finished pancakes to a wire rack in a 200°F oven to keep warm while you cook through the remaining batter. Serve in a tall stack with softened butter, real maple syrup, and if you have it, a dusting of powdered sugar.
Pro Tips
Rest the batter. Five minutes of rest allows the gluten to relax and the baking soda to begin reacting with the buttermilk. The result is a lighter, more tender pancake versus one cooked immediately after mixing.
Temperature control is everything. A griddle that’s too hot burns the exterior before the center cooks through; too cool and the pancake spreads thin and pale. Medium heat is correct. Test with a small drop of water — it should skitter and evaporate quickly.
One flip only. Flipping twice compresses the structure you’ve been building. Flip once, flip confidently, and leave it alone.
Don’t crowd the pan. Each pancake needs room so the steam escapes properly. Crowding traps moisture and softens the edges you’re working to crisp.
Fresh baking powder matters. If yours has been open for more than 6 months, test it: add a teaspoon to hot water. If it doesn’t bubble vigorously, buy a new can. Dead baking powder produces flat pancakes regardless of technique.
Storage & Make-Ahead
Cooked pancakes keep well in the refrigerator for up to 3 days, stored in a sealed container or wrapped tightly. Reheat in a toaster oven at 350°F for 4–5 minutes to restore the edges — a microwave will work in a pinch but softens the exterior.
For freezing, lay cooled pancakes in a single layer on a baking sheet, freeze until solid (about 1 hour), then transfer to a zip-lock bag. Frozen pancakes reheat directly in the toaster at medium-high and are ready in under 3 minutes.
Dry ingredients can be premixed and stored in a sealed jar for up to 3 weeks — a useful shortcut for weekday mornings. Simply measure your wet ingredients fresh when needed.
Frequently Asked Questions
Can I use regular milk instead of buttermilk?
Yes, with a substitution: stir 1 tablespoon of white vinegar or fresh lemon juice into 1 cup of whole milk, let it sit for 5 minutes, and use as directed. The acid content won’t be identical to real buttermilk, but it activates the baking soda and provides a similar tang. Whole milk gives the best result; skim milk produces a noticeably thinner batter.
Why are my pancakes coming out flat?
Three likely causes: overmixed batter (develops gluten and prevents rise), expired baking powder or baking soda, or a griddle that’s too hot and sets the exterior before the interior can lift. Check your leavening agents, mix less, and reduce heat.
Can I add mix-ins like blueberries or chocolate chips?
Absolutely. Fold them in at the very end, gently, after the batter has rested. For fresh blueberries, toss them lightly in flour first to prevent sinking. Scatter directly onto each pancake on the griddle rather than into the batter bowl — this gives you even distribution and prevents color bleed.
How do I keep pancakes warm without making them soggy?
Place cooked pancakes on a wire rack set inside a baking sheet in a 200°F oven. Never stack them directly on a plate and cover with foil — the trapped steam softens the surface and deflates the crumb.
Can I make this batter the night before?
The batter is best used within 30 minutes of mixing, as the leavening begins working immediately on contact with buttermilk. However, you can premix the dry ingredients and the wet ingredients separately, storing them in the refrigerator overnight. Combine them in the morning and let rest 5 minutes before cooking.
Recipe: Heritage Buttermilk Pancakes
Prep Time: 10 minutes
Cook Time: 15 minutes
Total Time: 25 minutes
Servings: 4 (10–12 pancakes)
Difficulty: Easy
Ingredients
For the Dry Mix:
- 2 cups all-purpose flour
- 2 tablespoons granulated sugar
- 2 teaspoons baking powder
- ½ teaspoon baking soda
- ½ teaspoon kosher salt
For the Wet Mix:
- 2 cups full-fat buttermilk, room temperature
- 1 large whole egg
- 1 large egg yolk
- 3 tablespoons unsalted butter, melted and slightly cooled
- 1 teaspoon pure vanilla extract
For Cooking:
- 2–3 tablespoons unsalted butter, for the griddle
Instructions
- Whisk all dry ingredients together in a large bowl. Form a well in the center.
- In a separate bowl, whisk buttermilk, egg, egg yolk, melted butter, and vanilla until smooth.
- Pour wet mixture into the dry well. Fold with a rubber spatula until just combined — lumpy batter is correct. Do not overmix.
- Let batter rest 5 minutes.
- Heat a cast-iron griddle or heavy nonstick pan over medium heat. Add a small pat of butter and let it melt and foam.
- Pour ¼ cup batter per pancake onto the griddle. Cook until bubbles form across the surface and edges look set and dry, about 2–3 minutes.
- Flip once. Cook 1–2 minutes more until the underside is deep golden brown.
- Transfer to a wire rack in a 200°F oven to keep warm. Repeat with remaining batter, adding butter to the pan as needed.
- Serve stacked with softened butter and real maple syrup.
Notes
- Room temperature buttermilk produces a smoother batter than cold — remove from the fridge 20 minutes before starting.
- For extra-thick pancakes, increase batter per pancake to ⅓ cup and extend cook time by about 1 minute per side.
- The batter will thicken as it sits; do not thin with additional liquid.